SCwriter – Installation and Setup Guide
Welcome to the SCwriter installation and setup guide. This article will help you install the SCwriter plugin on your WordPress site and configure it for optimal performance.
Requirements
Before installing SCwriter, ensure your environment meets the following requirements:
- WordPress Version: 6.0 or higher
- PHP Version: 7.4 or higher
- OpenAI API Key: An API key from OpenAI with a prepaid balance
- SCwriter API Key: An API key from SCwriter
Installation
You can install SCwriter directly from your WordPress dashboard or manually by uploading the plugin files.
Install via WordPress Dashboard
- Log into WordPress Admin: Navigate to your WordPress admin panel (yourwebsite.com/wp-admin).
- Navigate to Plugins
- Click on Plugins in the left-hand menu.
- Select Add New.
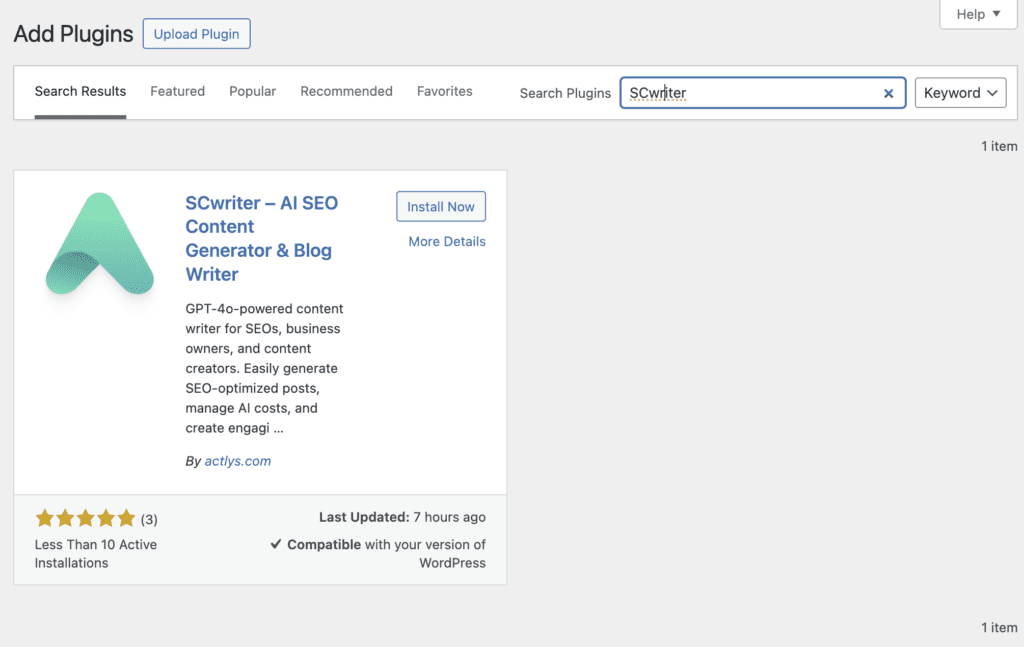
- Search for SCwriter
- In the Search plugins… field, type “SCwriter”.
- Install SCwriter
- Locate SCwriter – AI SEO Content Generator & Blog Writer in the search results.
- Click Install Now.
- Activate the Plugin
- After installation, click Activate to enable SCwriter on your site.
Manual Installation
- Download the Plugin
- Go to the SCwriter plugin page on the WordPress Plugin Directory.
- Click Download to get the scwriter.zip file.
- Upload the Plugin
- In your WordPress admin panel, navigate to Plugins > Add New.
- Click on Upload Plugin at the top of the page.
- Install the Plugin
- Click Choose File and select the scwriter.zip file you downloaded.
- Click Install Now.
- Activate the Plugin
- Once the installation is complete, click Activate Plugin.
Note: Ensure you have the necessary permissions to install plugins on your WordPress site. If you encounter any issues during installation, consult the WordPress Plugin Installation Guide or contact our support team.
Initial Setup
After activating SCwriter, follow these steps to set up the plugin.
SCwriter Account Creation
Automatic Account Creation
If this is your first time installing SCwriter and your admin email is not registered with us, a free SCwriter account will be automatically created for you upon activation. An API key will also be generated and saved in the plugin settings.

Manual Account Creation
If you prefer to create an account manually or need to retrieve your SCwriter API key:
- Register or Log In
- If you already have an account, click Log In and enter your credentials.
- If not, click Register to create a new account using your email address.
- Access Your API Key
- After logging in, navigate to the Licenses section.
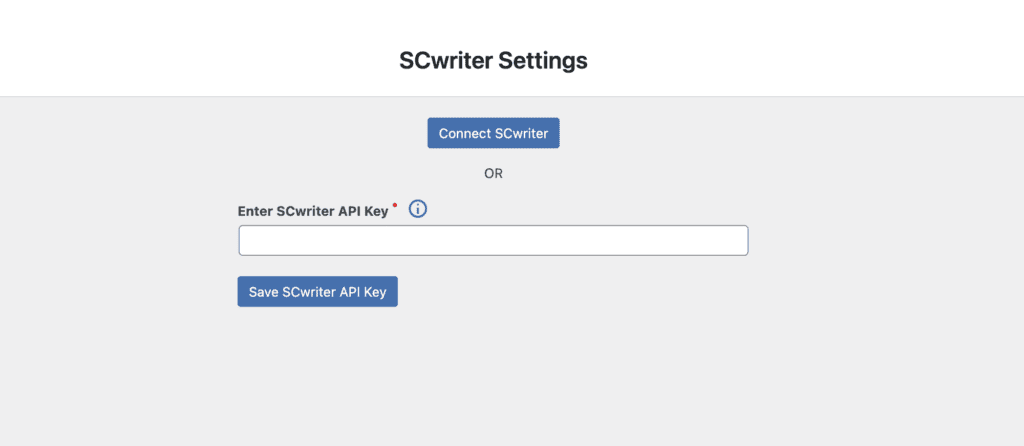
- Locate your SCwriter API Key and copy it.
Obtaining API Keys
SCwriter requires two API keys to function correctly:
- SCwriter API Key
- OpenAI API Key
SCwriter API Key
Refer to the steps in the SCwriter Account Creation section to obtain your SCwriter API key.
OpenAI API Key
- Create an OpenAI Account
- Visit the OpenAI Sign-Up Page.
- Follow the prompts to create a new account.
- Add Funds to Your OpenAI Account
- Go to the Billing Overview.
- Click on Set up paid account or Add a payment method.
- Enter your billing information and add funds as needed.
- Generate an API Key
- Navigate to the API Keys Page.
- Click Create new secret key.
- A dialog box will appear displaying your new API key.
- Copy the API key and store it securely. You won’t be able to view it again.
Important: Keep your API keys secure and do not share them publicly.
Configuring SCwriter Settings
With both API keys ready, you can now configure the SCwriter plugin.
Entering API Keys
- Access SCwriter Settings
- In your WordPress admin panel, navigate to SEO Blog Writer > Settings.
- Navigate to API Settings
- Scroll down to the 🧩 API Settings section.
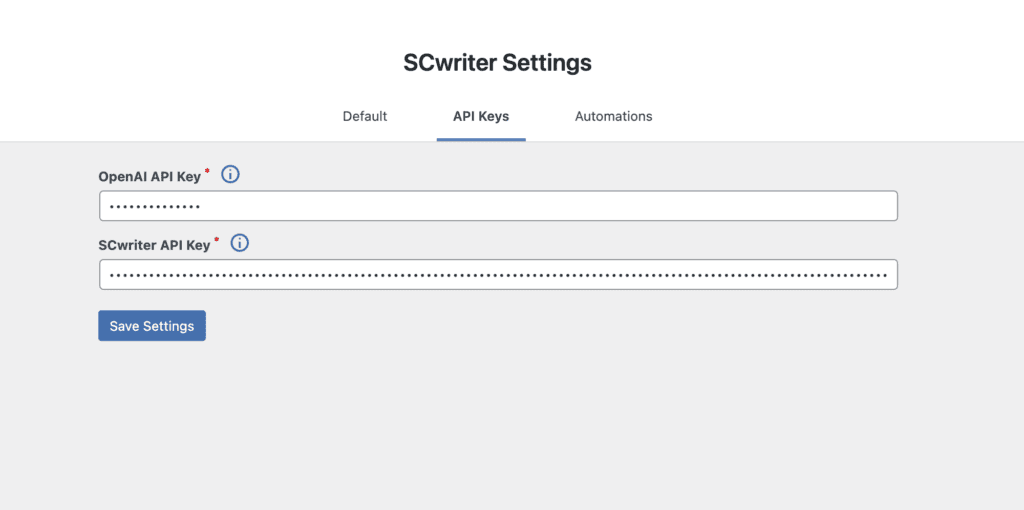
- Enter Your API Keys
- OpenAI API Key: Paste your OpenAI API key into the OpenAI API Key field.
- SCwriter API Key: Paste your SCwriter API key into the SCwriter API Key field.
- Save Changes
- Click Save Changes at the bottom of the page.
General Settings
While on the settings page, you can configure additional options to tailor SCwriter to your needs.
⚙️ Blog Settings
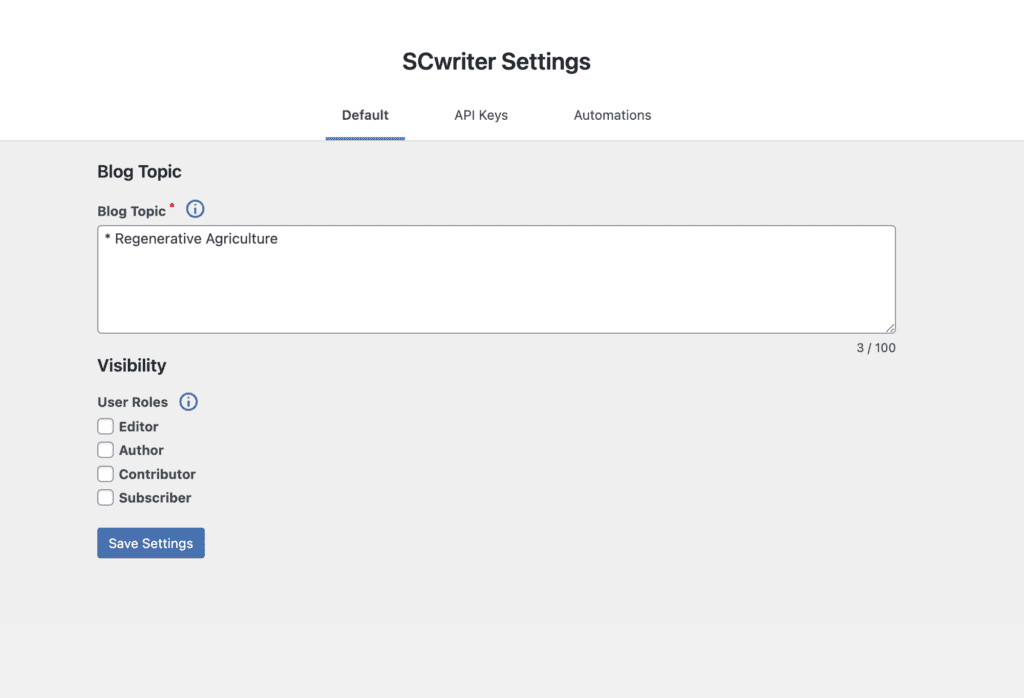
- Blog Topic: Enter the main topic or niche of your blog. This helps guide the AI in generating relevant content. For example: “
Superheroes with Unique Superpowers” or “Regenerative Agriculture. BIO food”
👥 Visibility Settings
- User Roles: Specify which WordPress user roles can generate the posts by SCwriter. Check the boxes next to the roles you want to grant access.
Automatic Post Creation Settings Fields
To configure the Automatic Post Creation feature in SCwriter, follow these steps:
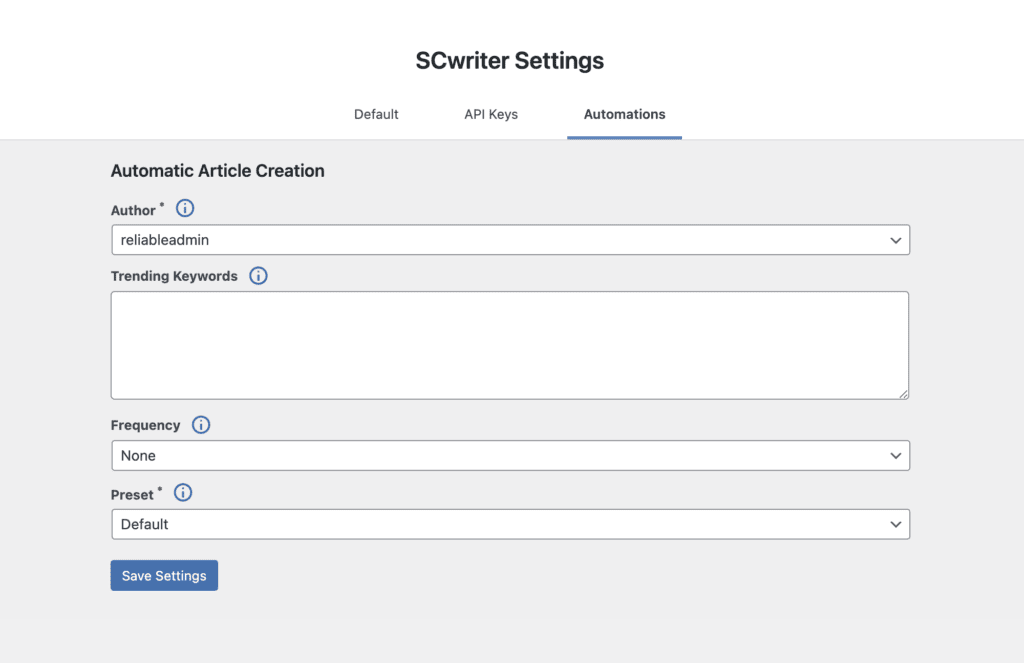
- Author: Select the user who will be listed as the author of the automatically generated posts from the dropdown menu.
- Trending Keywords: Enter your list of trending keywords, with each keyword on a new line.
- When an article is created using a keyword from this list, that keyword will be deleted from the list.
- If the list becomes empty, the AI will use the Blog Topic specified in your settings to generate relevant primary keywords and create articles.
- Frequency: Choose how often you want posts to be automatically created—options include hourly, daily, weekly, biweekly, or monthly.
- Preset: Select a preset from the dropdown menu to define the style and settings for the automated articles. Make sure you have created and saved a preset beforehand.
Click Save Changes at the bottom of the page.
Once configured, SCwriter will automatically generate new blog posts at the specified frequency using the provided keywords and preset settings. All posts will be saved as drafts, allowing you to review and publish them at your convenience.